NANO-EVK
Jump to navigation
Jump to search
1.Overview
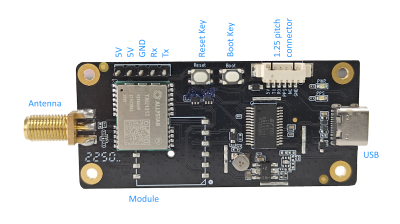
EVK-DG-1206 is a simple, friendly demo kit to evaluate the ALLYSTAR GNSS modules.
It integrates a USB interface to power the board and communicates with Host device.
Additionally, it is equipped with a 2.54mm connector, which allows easy integration with Raspberry Pi SBCs. It can be powered and communicate directly from the Pi.
There is also an extra 1.25mm pitch 6-pin connector for convenient transmission of test data to other devices.
It supports the following modules:
2.Pin and connector
- 5 Pins Header 2.54mm
support input and output 5V power supply, and support output data from this header
- 1.25mm Pitch connector
support output data from this connector.
5pin header and connector can only choose one.
- Button and LED
1. Reset button(PRRSTX), Press the reset button to generate a hardware reset to the module.
2. Boot button(PRTRG), The boot button is used to set the module to enter BootROM command mode.
   In this mode the module executes only the minimal functionality, such as updating new firmware.
3. Follow these steps to enter BootROM command mode:
  *Press and hold the BOOT button first, and then press RESET button. After that, release the RESET first, and then release the BOOT button.
4. The power LED indicates the power status. When the module is powered on, the LED is on.
Notes: The Boot button is not available for GEM1205.
3.Weight and Dimensions
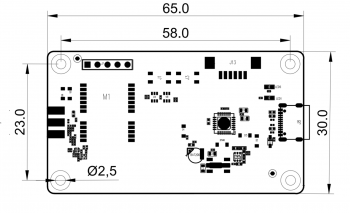
- Dimensions : 65 mm by 30 mm
- 4 mounting holes for M2.5 screws.
- SMA-K for Antenna.
- USB Type C.
- Mounting holes : 58mm x 23mm
- Weight: 9.8g
4.Quick Guide
EVK USB Serial driver for Windows
1. To start using the Evaluation kit, please make the following prepared:
   *EVK
   *GNSS Antenna
   *USB cable
2. Install the latest version of Satrack for Windows to the PC.
3. Connect the EVK with the antenna and PC.
4. Launch the Satrack application.
5. Select the corresponding COM port.
6. Set the baud rate if necessary by choosing “Device settings” on toolbar.
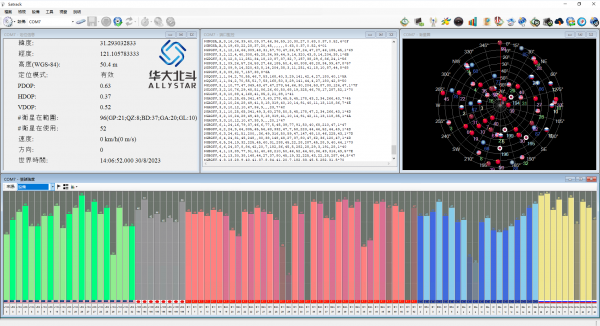
   If the port is selected and the baud rate is set correctly, Satrack program will show the received EVK output on the screen, signal strength, as well as satellite constellation
You can refer to here for instructions on how to operate Satrack.Quickguide


